Halloween Universe

The Screening Room

The Halloween Video Library

A curated, searchable archive of the dark craft — DIY props and animatronics, home-haunt walkthroughs, makeup, lighting, fog, and effects. Every film embedded from its creator, organized so you can actually find what you need.

17 videos

I Recreated the 2-1B Droid from The Empire Strikes Back
12:46
DIY PropsIntermediate

I Recreated the 2-1B Droid from The Empire Strikes Back

VanOaksProps walks through a detailed scratch-build recreation of the 2-1B medical droid head from The Empire Strikes Back, combining a scaled 3D-printed model with a real vintage microphone shell as its foundation. The build integrates custom greeblies, metal strip details, and coaxial connector hardware to achieve a convincing screen-inspired look. Finishing techniques include acetone vapor smoothing, layered metallic spray paints, acrylic weathering washes, and a simple LED circuit for glowing eyes. The result is a showpiece prop that balances accuracy with creative problem-solving.

VanOaksProps· 20,033 views
Turning a $10 Screwdriver Set into a Star Wars Movie Prop
12:30
DIY PropsIntermediate$10–$50 depending on resin and materials on hand

Turning a $10 Screwdriver Set into a Star Wars Movie Prop

VanOaksProps walks through a screen-accurate recreation of Rey's scavenged Star Destroyer capacitor bearing from The Force Awakens, starting from a common screwdriver cap and custom 3D-modeled parts. The build covers digital redesign of the prop's distinctive fin and collet details, followed by resin printing and assembly. A thorough painting and weathering sequence—using primer, matte black, Rub n Buff, acrylic washes, and Fuller's Earth—delivers a convincingly gritty, battle-worn metallic finish. A free 3D model file is provided for viewers to replicate the build themselves.

VanOaksProps· 5,113 views
How to Make a Star Wars Comlink Replica | The Last Jedi
9:26
DIY PropsIntermediate

How to Make a Star Wars Comlink Replica | The Last Jedi

VanOaksProps walks through a complete screen-accurate build of the Resistance Comlink seen in Star Wars: The Last Jedi, referencing the official visual dictionary to nail the design. The process covers resin 3D printing a small, highly detailed part and tackling the unique challenges that come with it. Multi-step painting techniques are demonstrated to achieve convincing metallic surfaces, a faux leather grip, and realistic battle weathering using an airbrush and sponge work.

VanOaksProps· 4,078 views
How to Build a Jedi Comlink (Qui-Gon Jinn & Obi-Wan Kenobi)
13:54
DIY PropsIntermediate$30–$80 depending on parts sourced

How to Build a Jedi Comlink (Qui-Gon Jinn & Obi-Wan Kenobi)

VanOaksProps walks through a detailed, screen-accurate build of the Jedi Comlink seen in the hands of Qui-Gon Jinn and Obi-Wan Kenobi across two Star Wars prequel films. The foundation is a vintage Gillette Sensor Excel razor — the same found object used by the original prop department — enhanced with custom 3D-printed parts, laser-cut acrylic, and hard-to-find specialty hardware like Coughtrie screws and aerospace pins. The tutorial concludes with a full weathering sequence using primer, spray paint, and oil washes to achieve a convincingly worn, screen-matched finish. It's a masterclass in blending digital fabrication with traditional kit-bashing for obsessive prop accuracy.

VanOaksProps· 11,310 views
Building the Hoth Scanner Prop | Star Wars Prop Replica
11:27
DIY PropsAdvanced

Building the Hoth Scanner Prop | Star Wars Prop Replica

This detailed build video walks through the full process of recreating Han Solo's Hoth Scanner prop from The Empire Strikes Back, combining FDM printing, resin printing, and real metal hardware for a screen-inspired replica. The creator covers prop research, surface preparation, and achieving convincing chrome and metallic finishes using accessible paints and buffing compounds. Assembly tips address structural durability, making the finished piece suitable for display or cosplay use.

VanOaksProps· 7,849 views
I Created The Final Halloween Tombstone Decoration
13:16
DIY PropsIntermediate$30–$70

I Created The Final Halloween Tombstone Decoration

VanOaksProps walks through the complete construction of a final Halloween tombstone, combining insulation foam and MDF to achieve a convincing stone-and-weathered-metal look. The build covers shaping and carving foam details, creating a custom faux metal plaque, and applying a multi-step paint finish that includes a masonry sealer base, hammered copper spray, patina effects, and aging washes. The result is a professional-quality graveyard prop suitable for yard haunts or haunted house displays. A thorough materials list with affiliate links accompanies the tutorial for easy replication.

VanOaksProps· 15,497 views
Star Wars Themed Room Lighting – Inspired by Disneyland’s Galaxy’s Edge
9:26
Lighting TutorialsAdvanced

Star Wars Themed Room Lighting – Inspired by Disneyland’s Galaxy’s Edge

VanOaksProps walks through the complete build of a screen-accurate Galaxy's Edge-style wall light fixture, drawing inspiration from the Droid Depot and cast-member doors at Disneyland's Star Wars land. The project covers every stage from 3D-printing ABS parts and sanding them smooth, through priming, painting, and oil-paint weathering, to wiring a 24-LED NeoPixel ring driven by an ESP32 microcontroller with a free animated Arduino sketch. The result is a fully functional, prop-quality sci-fi light suitable for a themed room or display. A complimentary 3D model file and Arduino sketch are provided for viewers to replicate the build.

VanOaksProps· 9,645 views
Building a Star Wars Hologram!
12:57
DIY PropsAdvanced

Building a Star Wars Hologram!

VanOaksProps walks through a full build of an Andor Season 2-inspired Star Wars holoprojector prop, combining vintage part sourcing and modification with 3D printing, laser cutting, and practical electronics. The build integrates an ESP32 microcontroller, Neopixel lighting, and a hologram fan to achieve an in-universe screen-accurate effect. Weathering is accomplished through airbrushing, oil paint washes, liquid latex, and Rub n Buff, giving the finished piece an authentic, battle-worn look. Downloadable files are available for creators who want to replicate the project.

VanOaksProps· 51,041 views
This Project Took 10 Years to finish
10:17
DIY PropsIntermediate

This Project Took 10 Years to finish

VanOaksProps revisits a decade-old ambition to build a screen-accurate replica of Leia's Boushh bounty hunter helmet from Return of the Jedi. After an unsatisfying first attempt that stalled at the painting stage, the creator starts fresh with refined skills and a more deliberate approach. The build focuses heavily on painting, weathering, and finishing techniques to achieve a convincing, film-accurate result.

VanOaksProps· 8,539 views
A SHOCKING Upgrade to my Haunted Mansion Window - USING AI!
10:29
Arduino & ControllersIntermediate

A SHOCKING Upgrade to my Haunted Mansion Window - USING AI!

VanOaksProps revives a Haunted Mansion-inspired window prop and levels it up by adding a realistic lightning effect powered by an ESP32 microcontroller and a NeoPixel LED strip. Rather than writing Arduino code from scratch, the creator uses the AI platform Deepseek to generate the lightning sketch, making the process accessible even to those with no coding experience. A 3D-printed project box houses the electronics cleanly, and the finished effect is designed to mount easily to the existing prop.

VanOaksProps· 13,044 views
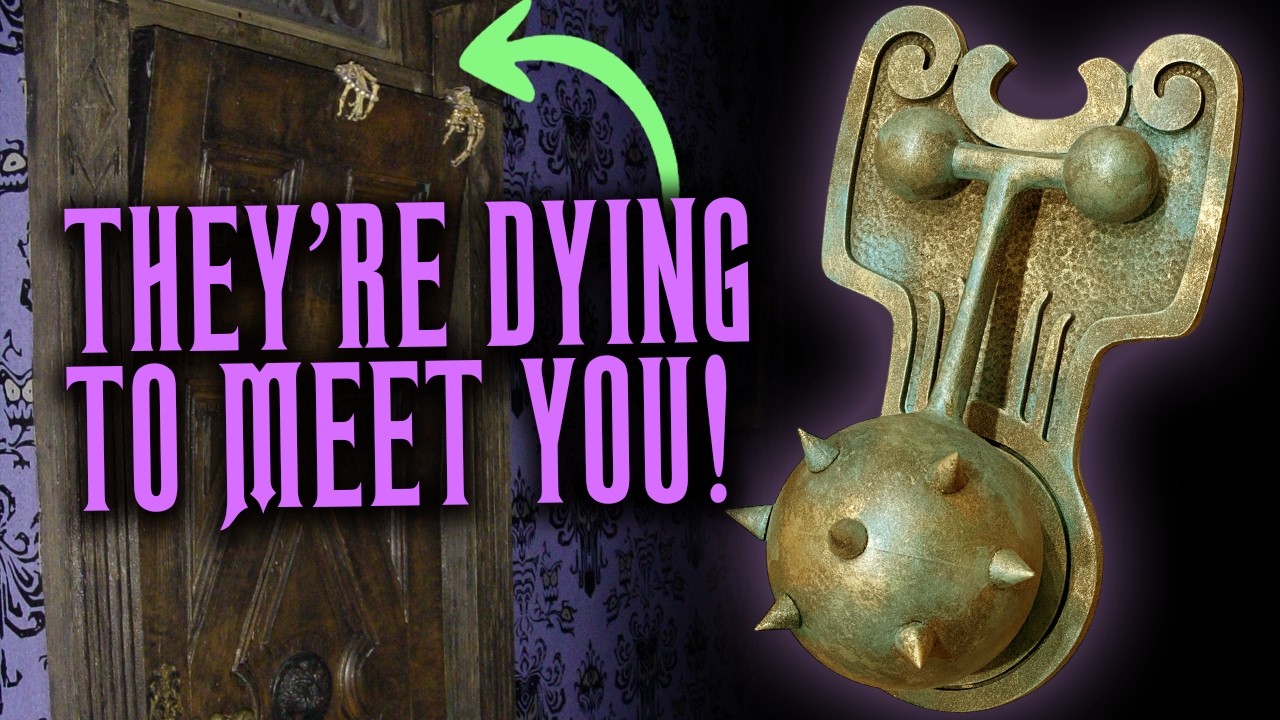
Haunted Mansion Prop from CHEAP Craft Store Finds!
13:09
DIY PropsIntermediate$30–$60

Haunted Mansion Prop from CHEAP Craft Store Finds!

VanOaksProps walks viewers through a step-by-step build of the iconic door knockers from Disneyland's Haunted Mansion Corridor of Doors, using inexpensive craft store and online finds. The build combines plastic ornaments, wooden beads, and a dowel as a base, with resin casting and Dremel work adding detail. A layered paint and finishing process — including automotive primer, spray paint, and Rub n Buff — sells the aged, ornate look of the original prop. A free downloadable PDF template is provided to help replicate accurate shapes.

VanOaksProps· 11,949 views
DIY Star Wars Data Panel with VIDEO!
11:13
DIY PropsIntermediate

DIY Star Wars Data Panel with VIDEO!

VanOaksProps walks through building a Star Wars-inspired data panel as a personal display piece, centered around a 10-inch digital photo frame that plays looping video content. The build layers laser-cut panels, EVA foam details, split loom and drain hose greeblies, and LEDs to achieve an authentic sci-fi control panel aesthetic. Airbrushing and oil paint weathering give the finished piece a battle-worn, screen-accurate look. SVG and 3D files for the panel design are available through the creator's Etsy shop.

VanOaksProps· 14,245 views
Creepy Wilting Flower Prop for Halloween
8:05
DIY PropsIntermediate$20–$50

Creepy Wilting Flower Prop for Halloween

VanOaksProps walks through building a mesmerizing wilting flower Halloween prop that slowly droops and recovers using a low-RPM synchronous motor. The mechanism relies on a cam-and-follower system, magnets, and closet door rollers to produce smooth, eerie movement. Downloadable 3D print files are available through the creator's Etsy shop, making replication straightforward for builders with access to a printer.

VanOaksProps· 14,553 views
Andor Holoprojector Replica Prop | #starwars
6:15
DIY PropsIntermediate

Andor Holoprojector Replica Prop | #starwars

This build video walks through recreating the Pre-Mor Holoprojector from Episode 3 of the Andor TV series as a handheld replica prop. The creator kitbashes a vintage Bandai handheld game as the prop's base, integrates functional LED lighting, and adds a 3D-printed bezel for screen accuracy. Layered spray paint and acrylic washes are used to achieve a weathered, lived-in Star Wars aesthetic.

VanOaksProps· 8,185 views
LET'S MAKE: #StarWars Fusion Furnace/Fusion Generator - Smart Lamp Hack!
9:09
DIY PropsIntermediate$30–$80 (estimated based on lamp, filament, paints)

LET'S MAKE: #StarWars Fusion Furnace/Fusion Generator - Smart Lamp Hack!

VanOaksProps walks through a casual, build-along episode of crafting a Star Wars-inspired fusion furnace/generator prop by combining a 3D-printed shell with an off-the-shelf smart LED lamp. The build is credited to a fellow maker whose lamp-hack concept inspired the project. Painting and weathering techniques give the finished piece a worn, screen-adjacent look suitable for display in any Star Wars fan space.

VanOaksProps· 9,406 views
SERIES: Haunted Mansion Home Office Part 3 - Windows
9:34
DIY PropsIntermediate

SERIES: Haunted Mansion Home Office Part 3 - Windows

Part 3 of VanOaksProps' ongoing series converting a small home office into a Disneyland Haunted Mansion-inspired space focuses on building a decorative window cornice modeled after the iconic ride. The creator collaborates with fellow channel Hollywood Haunter to bring the look to life using woodworking, staining, and painting techniques. The result is a faithful replica architectural detail that anchors the room's theme-park aesthetic.

VanOaksProps· 17,558 views
Star Wars Droid Caller Prop and Retro Packaging
12:50
DIY PropsIntermediate

Star Wars Droid Caller Prop and Retro Packaging

VanOaksProps walks through building a Han Solo Droid Caller prop replica and presenting it in custom retro-style action figure packaging that evokes vintage Kenner Star Wars card backs. The project blends prop painting techniques — including airbrushing, metallic finishes, and weathering washes — with graphic design and physical packaging assembly to produce a display-ready collectible. A vacuum former is used to create a blister shell, and a printed card back completes the nostalgic presentation. The result doubles as both a screen-accurate prop replica and a whimsical fan collectible display piece.

VanOaksProps· 8,328 views